
with the latest version of BlueEDM, you have all engine monitoring data from your EDM device at your fingertips right after your flight. All you need is an iPhone or an iPad, the BlueEDM app and some Bluetooth adapter with a corresponding cable.
You could buy a Bluetooth-RS232 adapter (like the LinTech device) and take JPI’s adapter cable (which plugs into your EDM device and has an RS232 plug to connect to the adapter) as described in Bluetooth Low Energy Adapters for downloading engine data from an EDM engine monitor. Although this looks quite convenient, still you need the JPI cable and you will have to configure the Bluetooth adapter over its RS232 port in order to make it work with the EDM.
This article shows what parts are required to build your own adapter without the need to purchase the JPI cable and with a minimal set of components. In the end you will have only one piece that you can plug directly into your EDM700. For those of you who don’t have the time or patience to do the soldering, you can drop me an email at staski@venus-flytrap.de. At least for a limited number, I would be able to do that for you (of course charging the time it takes for me).
The picture below shows the components for this adapter and what the adapter finally looks like.

The pieces shown according to their numnbering:
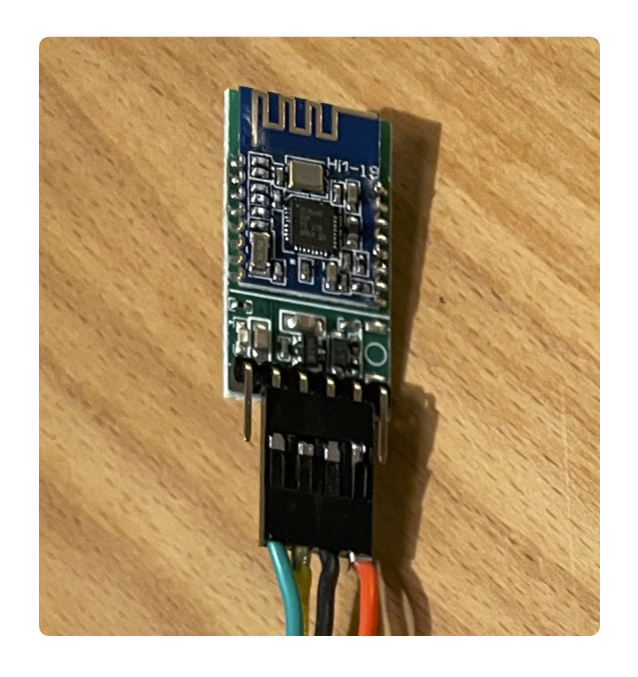
- The Bluetooth Serial module (DSD Tech HM-19, in this example). This is the central part of the adapter translating serial signal (TTL-logic) into Bluetooth packets. These modules have at least four pins: PWR, GND, SND, RCV. The HM-19 shown here has additional pins, which are not relevant in our context. As the EDM can only send and does not receive data, the adapter’s send pinout (connected to the yellow cable) is terminated at the RS232-to-TTL converter (see picture below). For the modules themselves, I prefer the ones that have Dupont-Plugs as in the picture. This allows you to plug in the modules into my test equipment (see below) for configuration an final testing before first usage.
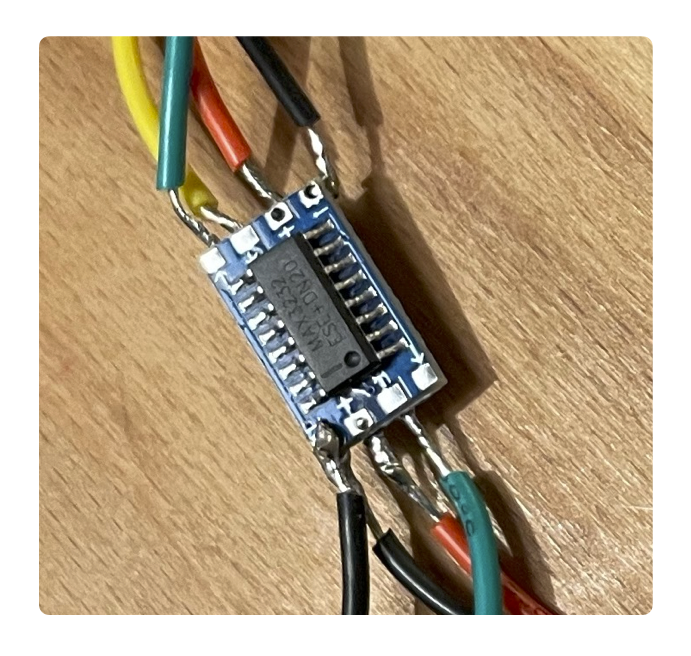
- An RS232 to TTL converter. These are usually based on the TI MAX3232 line driver, which allows to operate an external RS232 device (the EDM700 in our case) at 3.3V or 5V. The module which we use (see e.g. here) is ready to use with 3.3V. Usage with 5V would require additional capacities.
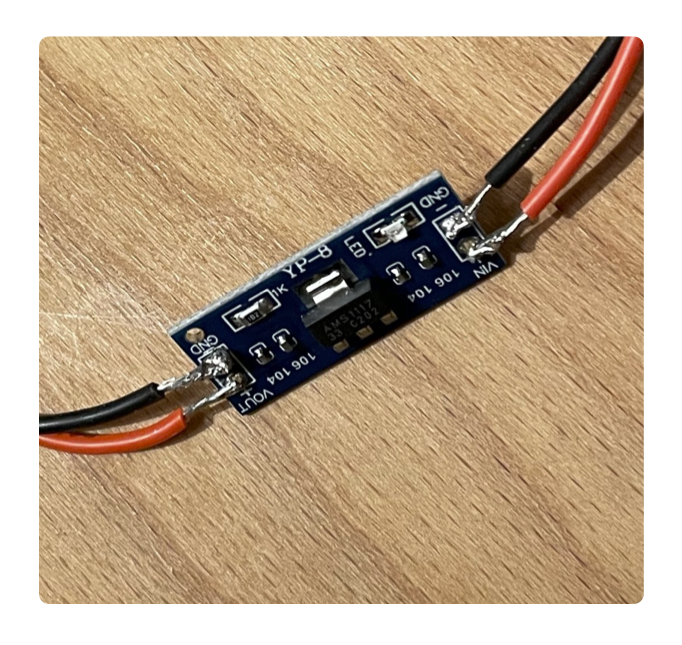
- A stepdown voltage regulator.
Strictly speaking this would not be required if we supply our unit directly with 3.3V. Actually I started with a single CR2032 coin battery (see below) with nominal 3V. Unfortunately the result was not reliable. It worked for some Bluetooth modules, while for others it failed. The reason is that due to losses the maximum voltage at the module was around 2.8V wich is too low for a reliable operation. The voltage regulator outputs a constant voltage reliably and independent of the input voltage as long as this is above 4V.
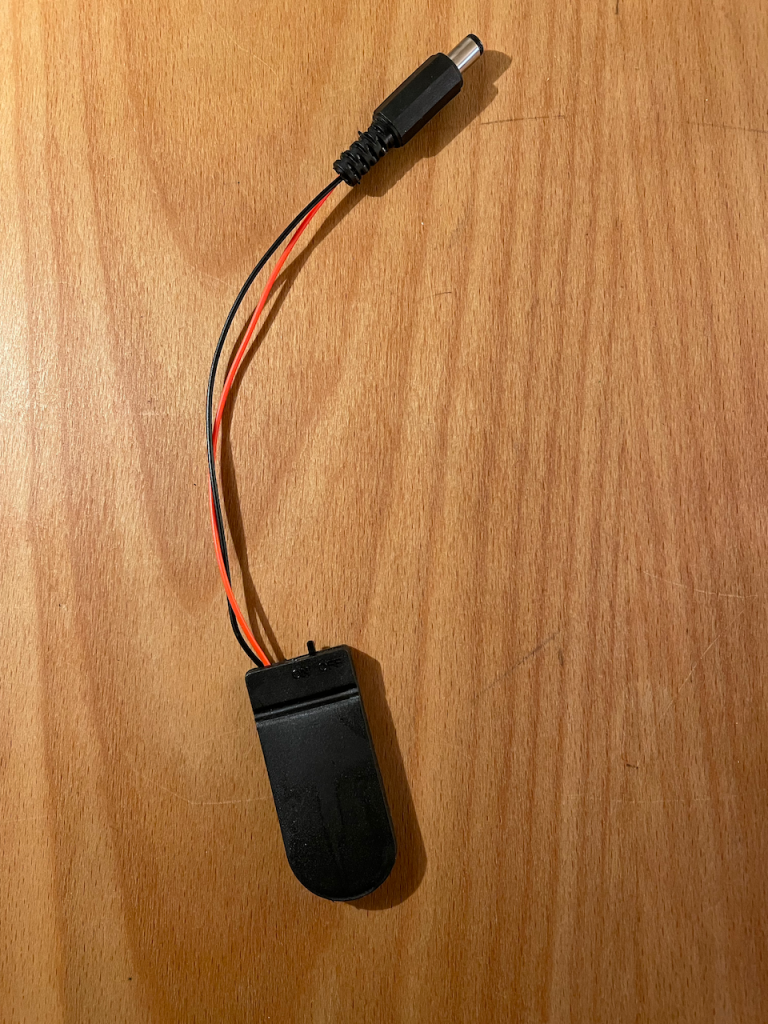
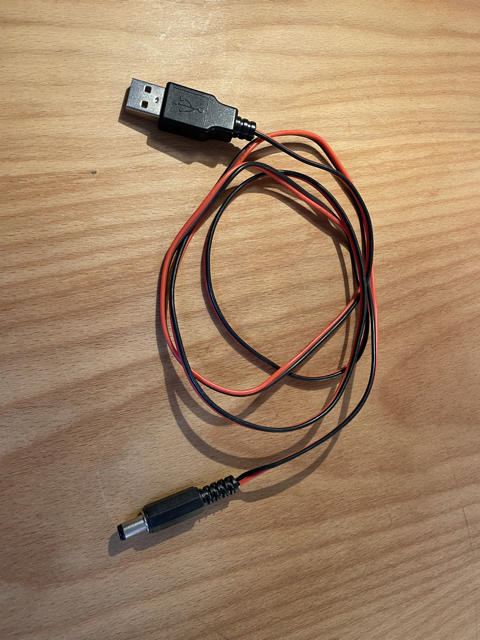
Finally you need the external plugs: with number 4 above is the serial connector that plugs into the EDM700. It is a 5.5 x 2.5 mm barrel jack with the inner drum connected to the send port (RCV on the adapter) and the outer drum connected to GND. For the power plug (accepting 4V-7V), I prefer a female barrel jack (5.5 x 2.5 mm). This allows me to connect either a plain USB like power chord or a double CR2032 coin battery housing, see pictures below. Especially the coin battery version is very convenient because you can operate without external USB power.
Some helpers
we could be done with this, the adapter is complete. However, I want to mention two more pieces that turn out to be very useful for configuring, testing and simulating:
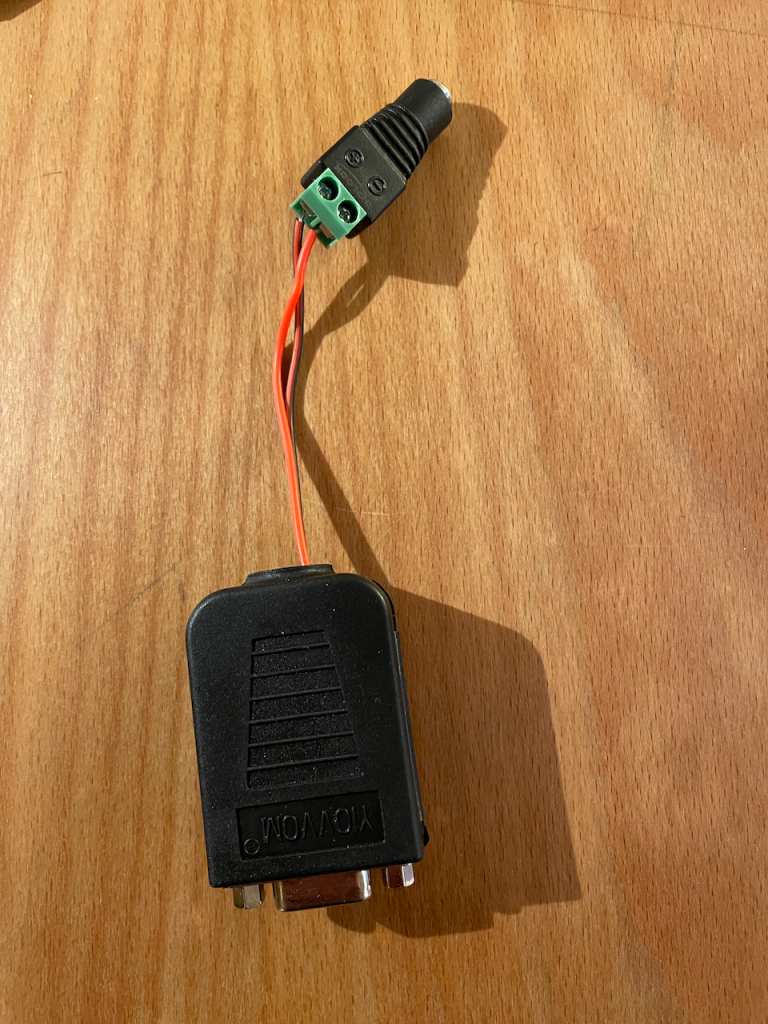
The first is an adapter that, together with my Mac, acts as my EDM700 simulator. It consists of a female barrel jack plug with the same dimensions as the EDM plug on one side and a regular RS232 DSUB-9 plug on the other end. I plug it with the DSUB-9 port into my Mac (via a Digitus USB Serial adapter), start Cool-Term terminal emulation with the serial port configured appropriately (e.g., 19.200 baud), and use Cool-Terms „Send file“ feature to send JPI files via the serial connection to the Bluetooth adapter.
The second helper is a construction that includes similar components as the Bluetooth adapter. However, both serial ports, SND and RCV are present. This „adapter“, when plugged into my Mac’s serial port, allows me to configure the HM-19 module via the serial ports. Since the DSD tech devices are delivered with a factory default of 9.600 baud, the has to be switched once to 19.200 baud. For some DSD Tech devices (confirmed for one HM-18 device I have seen), this can be done via the Bluetooth link, however for the HM-19 device shown above, this was only possible via the serial port.
